
Tuesday, August 19, 2014
This is why we can't have nice things...
Saturday, August 2, 2014
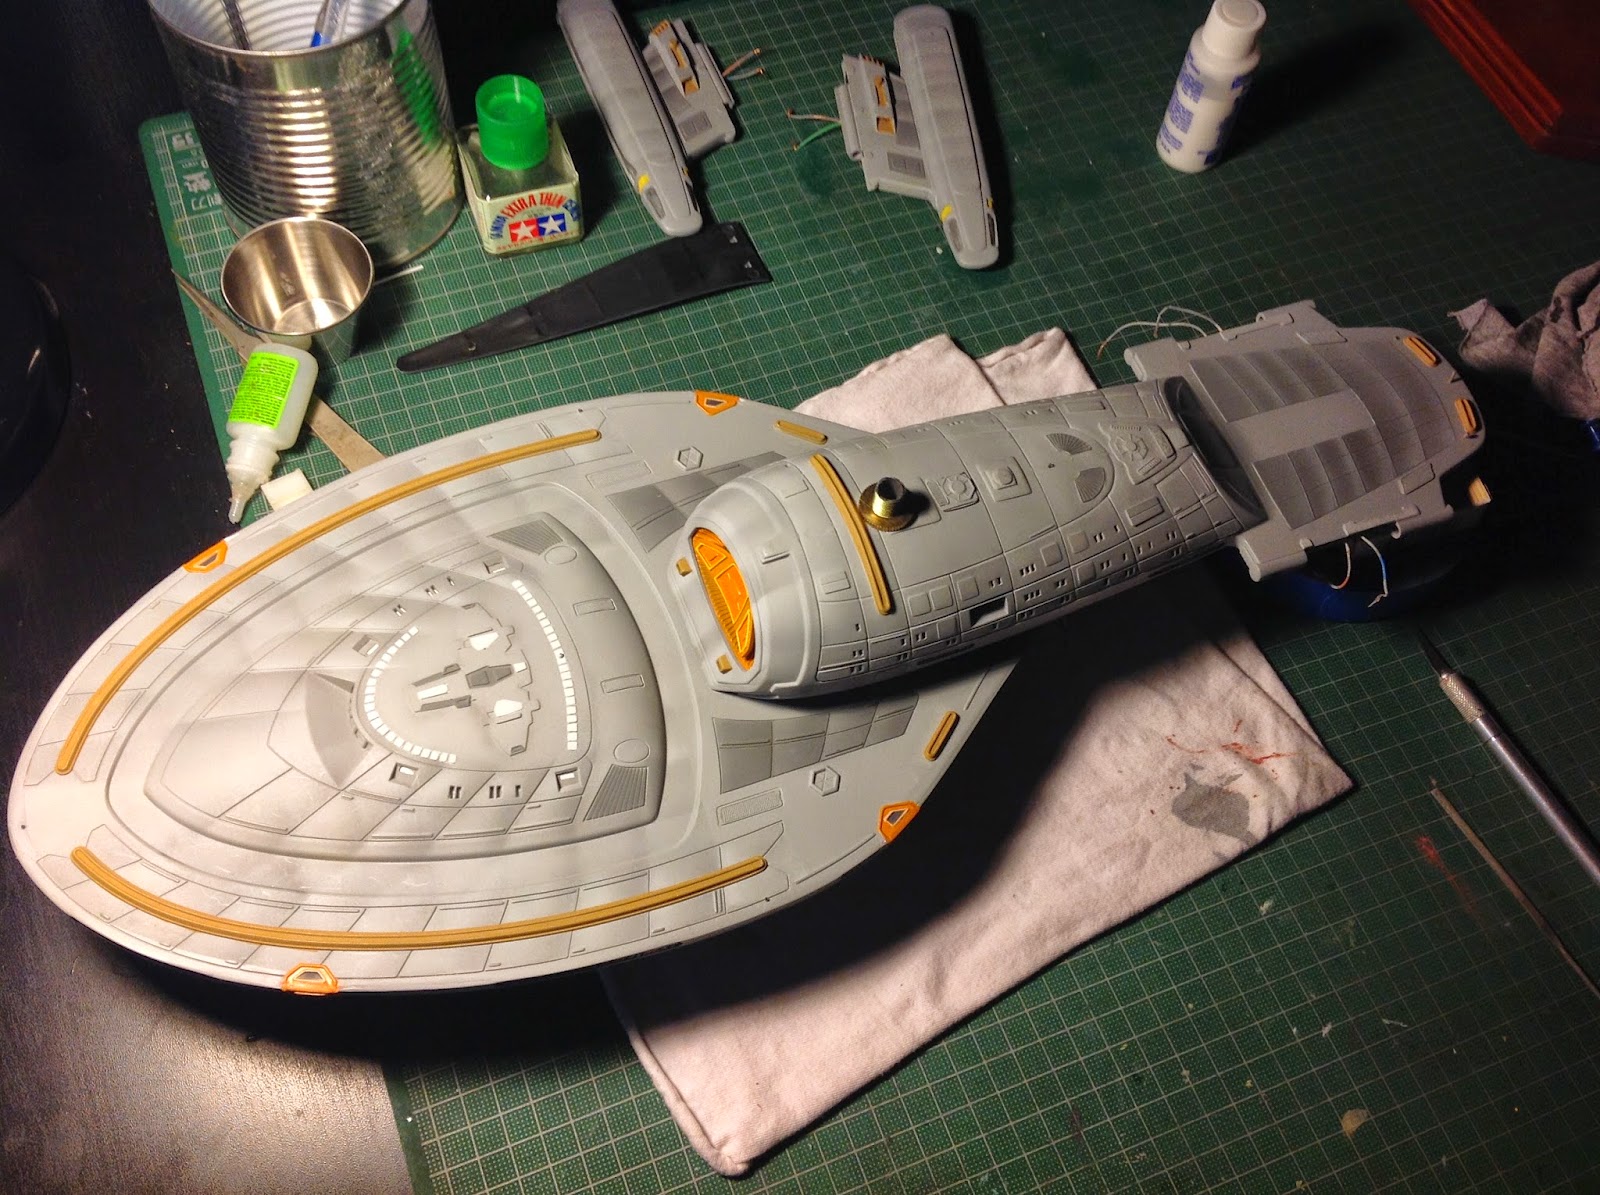
Revell U.S.S. Voyager Build

Here is my Revell U.S.S. Voyager Build. I didn't actually plan to document it on a blog, so the pictures are not a step by step guide. I have few pics of the electronics or the fiber optics being put in. I'm going to try to remember the problems and solutions that I had at each step, so that this can hopefully be of help to somebody building one for the first time.

#68 Drill Bits
Two holes per window, top and bottom.
Then I went in with an exacto blade to cut the remaining plastic out from between the two holes. I cleaned up the hole with a flat micro file.
Micro File Set
.jpg "Revell U.S.S. Voyager")
This whole process took me a about a week of working on it for as long as I could stand it before taking a break. Be sure to clean up the back side as well. It was at this point that I thoroughly washed all the parts in dishwashing detergent to get the mold release off.
.jpg "Revell U.S.S. Voyager")
Before doing this, you will need to sand down the raised details on top of the bridge module. I used a large flat file to get it done quickly. The easiest way to apply these is to set them in place and then put a piece of masking tape over them. Peel up the tape with the parts stuck onto it, apply the glue and them lay it back down. Once the glue is dry you can remove the masking tape.
You will also need to cut out the two windows on the front of the bridge module and the vents to the impulse engines on the warp pylons. The kit comes with Air Locks as well (not pictured), which are recessed on the studio model. I just glued mine to the surface, but in hindsight I wish I had cut out the plastic in those areas and glued the PE behind to give it the correct recessed look. Ah, next time.....
.jpg "Revell U.S.S. Voyager")
.jpg "Revell U.S.S. Voyager")
I like to use Tamiya Fine Surface Primer. It's more expensive, but I think it is well worth the price. It is just the best primer I have ever used, plain and simple. It goes on smooth and dries fast. I get mine at my local hobby store for $10 a can. I used the regular gray instead of the light gray for this. Once I got this all primed I realized that the primer color was very close to the color that Rick Sternbach (the designer of the ship) recommends for a screen accurate version of the ship (as opposed the a studio model color accurate version). The studio model is actually painted deckhouse blue. However, they toned the colors down in post production and the ship appears as a cool gray with a hint of blue on screen. I used the primer as the base color for the whole model.
Sternbach on Trek BBS 9th post down.
.jpg "Revell U.S.S. Voyager") For the shading, I used Tamiya XF-54 Dark Sea Gray mixed with a little black. Using a piece of paper as a mask I set the paper on each grid line and lightly sprayed the edge of the paper, letting it bleed over to the model. This produces a feathered and shaded look forward of each grid line. I then went and applied the same technique behind every grid line using White paint. When I thought it was too much contrast I went back and lightly oversprayed some of the gray primer base color to tone it down. I realize that he studio model was not painted this way and it never looked like this on screen. But for me this is an artistic endeavor and I wanted to try the technique. Plus, I think it looks cool, so sue me.
For the shading, I used Tamiya XF-54 Dark Sea Gray mixed with a little black. Using a piece of paper as a mask I set the paper on each grid line and lightly sprayed the edge of the paper, letting it bleed over to the model. This produces a feathered and shaded look forward of each grid line. I then went and applied the same technique behind every grid line using White paint. When I thought it was too much contrast I went back and lightly oversprayed some of the gray primer base color to tone it down. I realize that he studio model was not painted this way and it never looked like this on screen. But for me this is an artistic endeavor and I wanted to try the technique. Plus, I think it looks cool, so sue me..jpg&container=blogger&gadget=a&rewriteMime=image%2F* "Revell U.S.S. Voyager") You may be wondering why the heck I pained it before glueing it together. This is a technique that I learned from watching Boyd Crompton of Trek Works. Foremost, painting it while in pieces makes it much easier to handle the model and get the airbrush at the correct angels without worrying about overspray on other finished parts of the model or breaking anything. Secondly (maybe more importantly, actually) is that you will not need to mask off all of those windows!
You may be wondering why the heck I pained it before glueing it together. This is a technique that I learned from watching Boyd Crompton of Trek Works. Foremost, painting it while in pieces makes it much easier to handle the model and get the airbrush at the correct angels without worrying about overspray on other finished parts of the model or breaking anything. Secondly (maybe more importantly, actually) is that you will not need to mask off all of those windows!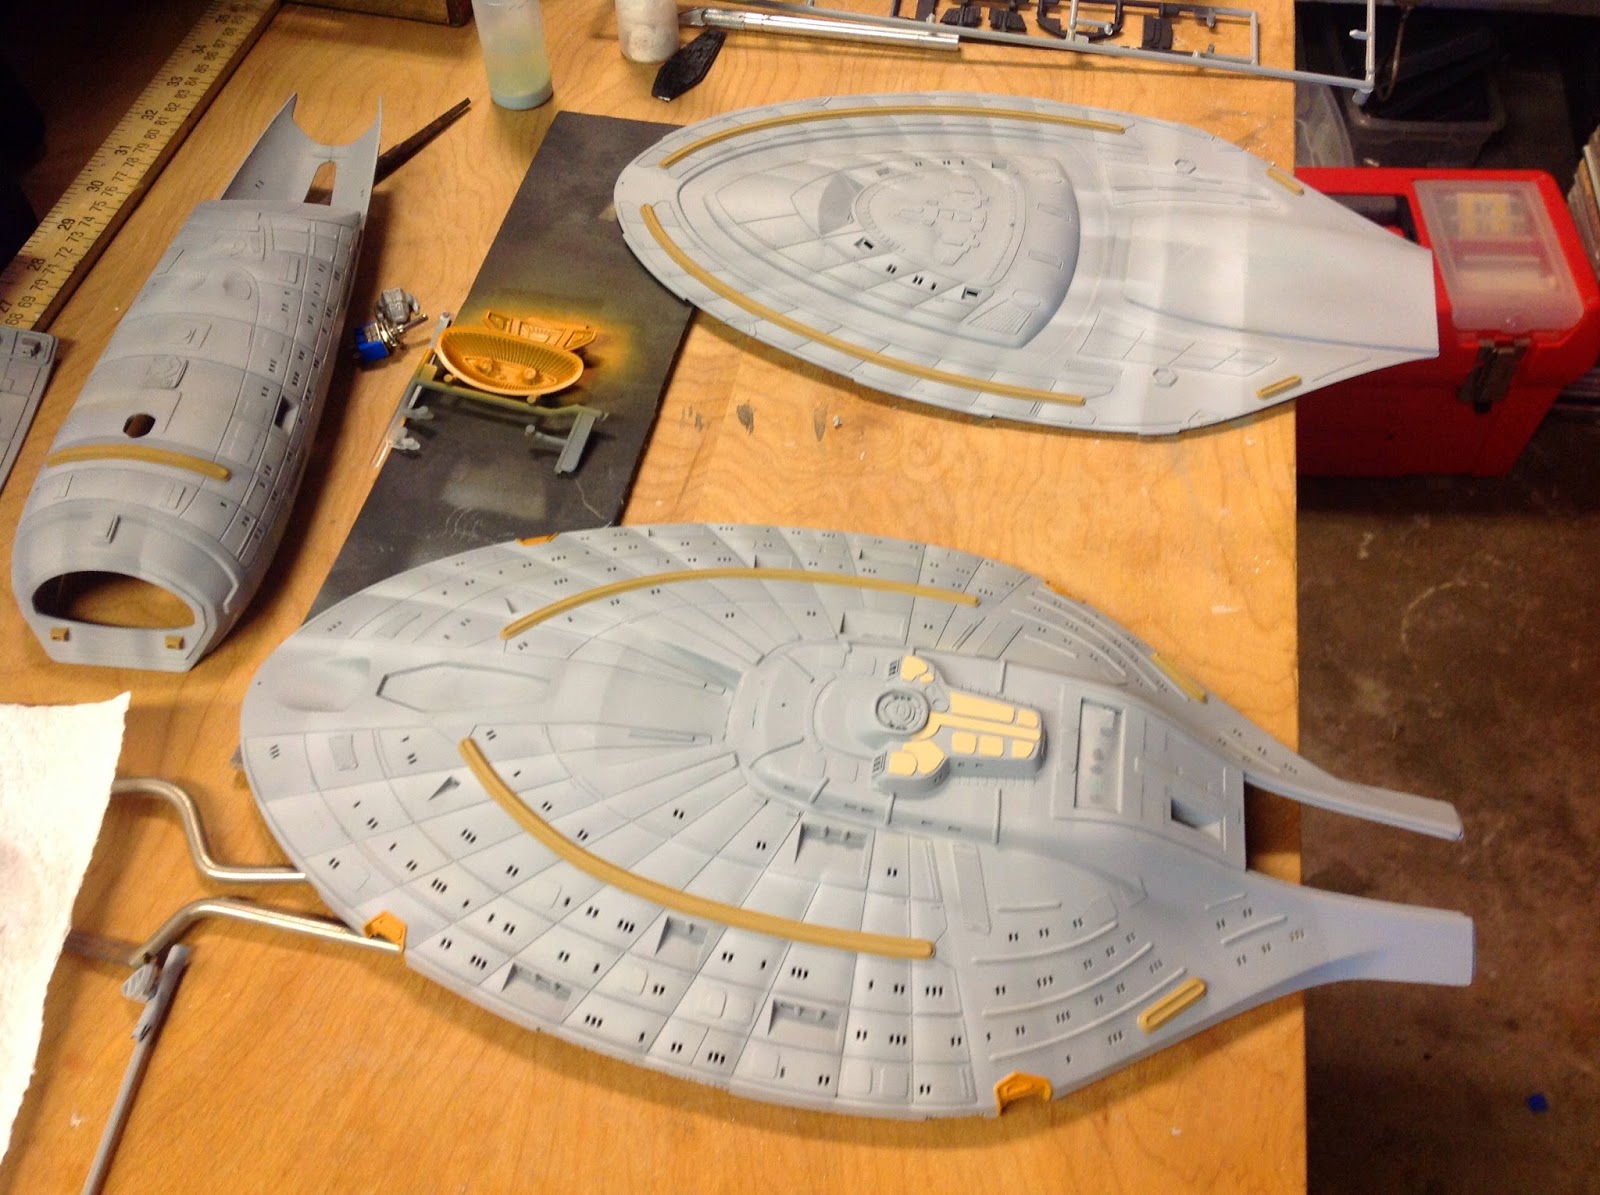.jpg "Revell U.S.S. Voyager") This technique has one drawback; You have to be very careful handling the model during subsequent painting and construction or you will screw up you pretty paint job! Once you have it all painted and glue it together, it is fairly easy to mask off the seams, putty and sand them, then repaint just that area. Be careful not to make a paint line where the new paint hits the edge of the masking tape.
This technique has one drawback; You have to be very careful handling the model during subsequent painting and construction or you will screw up you pretty paint job! Once you have it all painted and glue it together, it is fairly easy to mask off the seams, putty and sand them, then repaint just that area. Be careful not to make a paint line where the new paint hits the edge of the masking tape.Next I masked off the Phaser strips and RCS Thrusters with Tamiya Masking Tape. I have found Tamiya tape to be far superior to using blue painter's tape. I have never had Tamiya tape pull up any paint. I painted the phaser strips Tamiya XF-59 Desert Yellow.
.jpg "Revell U.S.S. Voyager") I then masked off and painted the RCS thrusters a mixture or Tamiya X-6 Orange and XF-59 Desert Yellow (same mix I did for the Deflector dish).
I then masked off and painted the RCS thrusters a mixture or Tamiya X-6 Orange and XF-59 Desert Yellow (same mix I did for the Deflector dish).If I ever build another one of these, I think that I will wait until I have the hull assembled and the thrusters completely glued into place before painting these. The secondary deflector dish was painted the same orange and glued into place.
The sensor arrays were painted flat black then dry brushed with a dark gray, a lighter gray and finally aluminum. Then I went in with a small brush and painted all the little details with red, light blue and copper.
Once I was finished Painting, I glued .08" Styrene behind all of the windows. I did this instead of filling them with window maker or acrylic, because the windows on this model are not supposed to be flush with the hull; They are inset.
Also, the sensor strips on the sides of the saucer are the wrong shape on this model. They are squared of at the end, when they should be round. I did my best to round the edges out to make them more accurate. I'll be sure to get a shot of those in the finished pics.
Next up were the warp nacelles and pylons, which I had previously assembled and installed the electronics into. Sorry, I didn't take any pics of that step. I glued half round styrene strips wrapping around the back of each engine for the missing details that are present on the studio model.
.jpg "Revell U.S.S. Voyager") I used blue LED tape for the grilles and red for the collectors. I separated and light blocked the red from the blue with a piece of spongy black foam. For the Nav Lights I used Red and Green 3mm LEDs with a 1mm fiber optic (Green for Starboard, Red for Port). I did not paint the collectors red or the grilles blue. These parts were clear on the studio model, with the color only coming from the lighting.
I used blue LED tape for the grilles and red for the collectors. I separated and light blocked the red from the blue with a piece of spongy black foam. For the Nav Lights I used Red and Green 3mm LEDs with a 1mm fiber optic (Green for Starboard, Red for Port). I did not paint the collectors red or the grilles blue. These parts were clear on the studio model, with the color only coming from the lighting.
There is also a red LED in each pylon under each impulse engine, diffused by a piece of opaque white vellum.
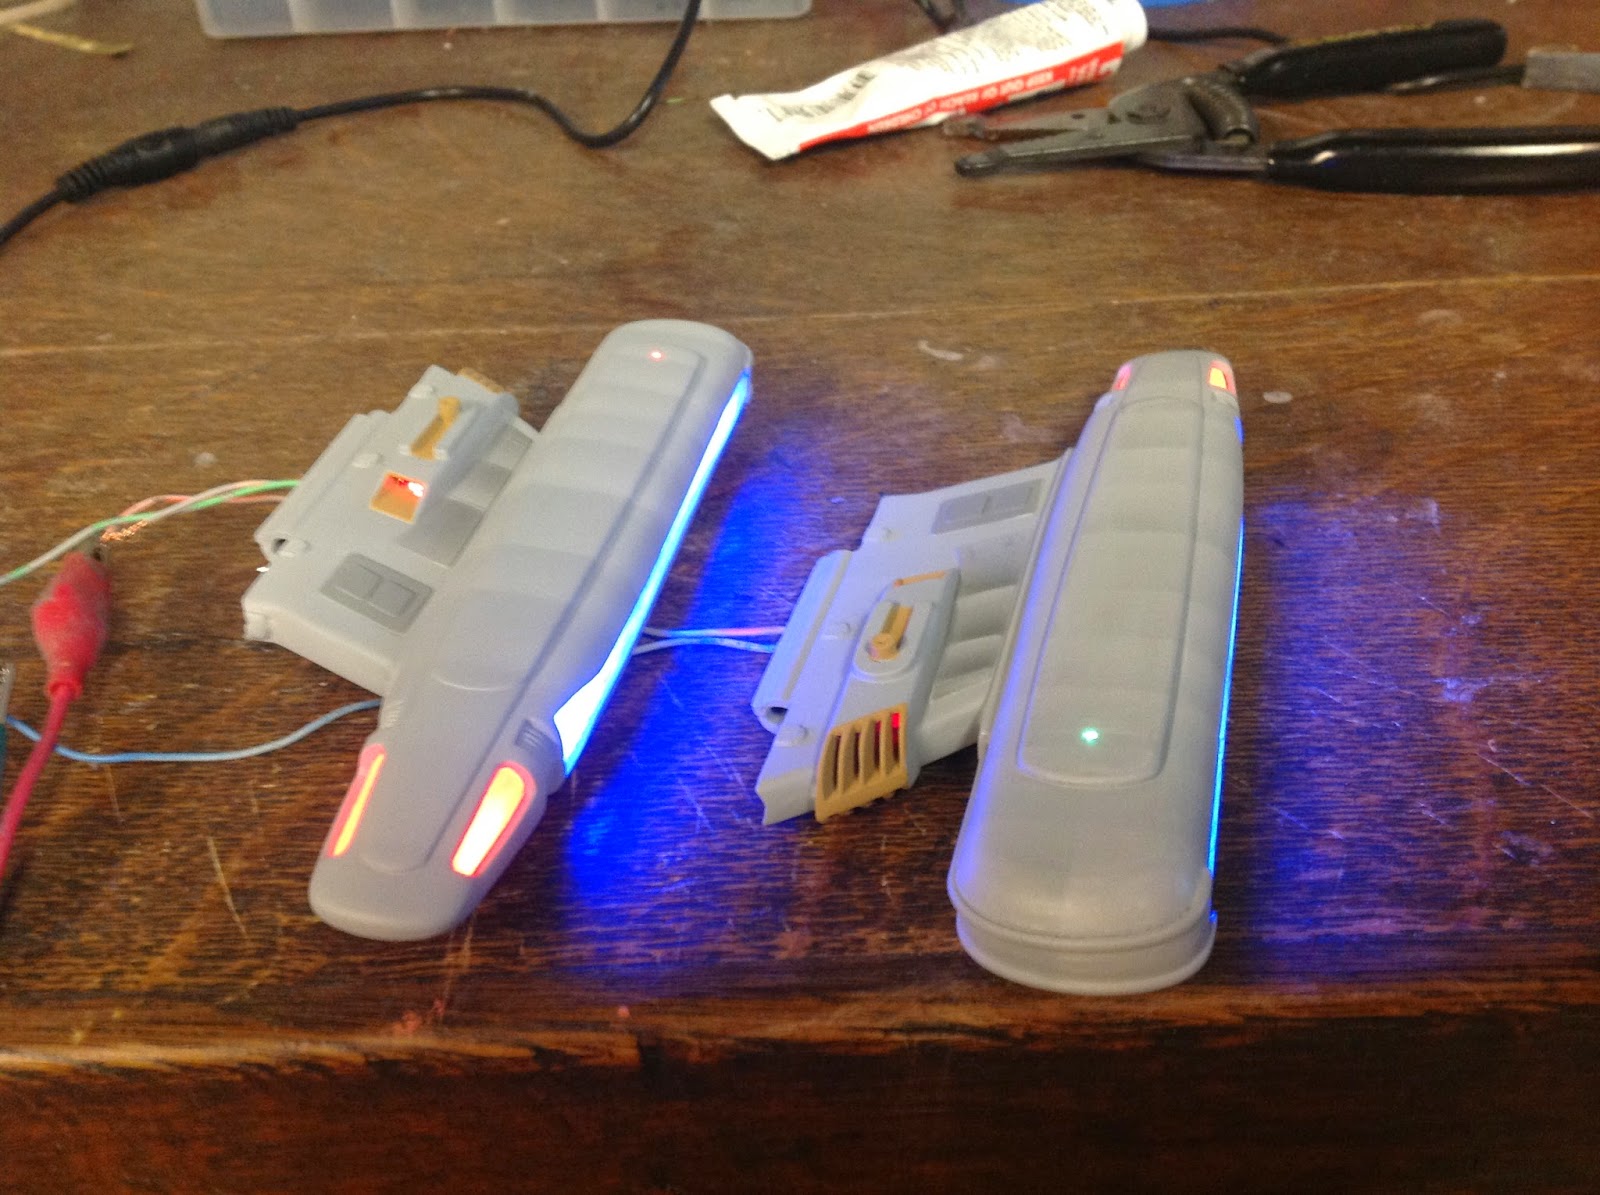.jpg "Revell U.S.S. Voyager") I constructed the engines before painting. I masked off the collectors and grilles and I used the same painting technique with the gray/white shading. Thee are no lines on the engines so I just made lines where I thought they looked good.
I constructed the engines before painting. I masked off the collectors and grilles and I used the same painting technique with the gray/white shading. Thee are no lines on the engines so I just made lines where I thought they looked good.
Then I pained the accent colors on the impulse engines and phaser strips Tamiya XF-59 Desert Yellow. The darker panels were masked and painted the same mix of Tamiya XF-54 Gray and black, with white feather technique shading.
.jpg "Revell U.S.S. Voyager")
.jpg) For the Main Deflector Dish I used the same combo of orange/desert yellow for this. It looks muddy in these pics, but it is a nice dark orange in person. I masked off the area where I wanted light to come through and painted both pieces orange. Most people leave this clear and paint it transparent blue. On the studio model it is orange and the blue comes from the light emitted from the hole behind the "dish". I wasn't sure if this would work, but it worked pretty well!
For the Main Deflector Dish I used the same combo of orange/desert yellow for this. It looks muddy in these pics, but it is a nice dark orange in person. I masked off the area where I wanted light to come through and painted both pieces orange. Most people leave this clear and paint it transparent blue. On the studio model it is orange and the blue comes from the light emitted from the hole behind the "dish". I wasn't sure if this would work, but it worked pretty well!
I painted the recessed areas a brighter orange, the raised lines yellow and glued it into the hull.
.jpg)
.jpg)
.jpg)
The fantail was an extra fun piece of work (insert sarcasm here). It has to be constructed before painting as you have to putty the seams and sand 'em down. Getting the LEDs in that small space with the Fiber Optics connected and running out the top and bottom was especially challenging. Getting the rear window to illuminate without the shadow of the fiber for the white flasher, or the white flashing light showing up through the windows was also a bit of a challenge.

You will notice that by building it this way, I cannot insert the hinge for the engines to pivot up and down. Personally, I hate the way this ship looks with the engines up. I am going to glue them into place in the down position.
Once that fantail was all tidied up, I glued it into place on the secondary hull. Make sure you build the interior of the shuttle bay first! I didn't plan on having the door open so I left it out only to later discover that that is what holds the back wall on!
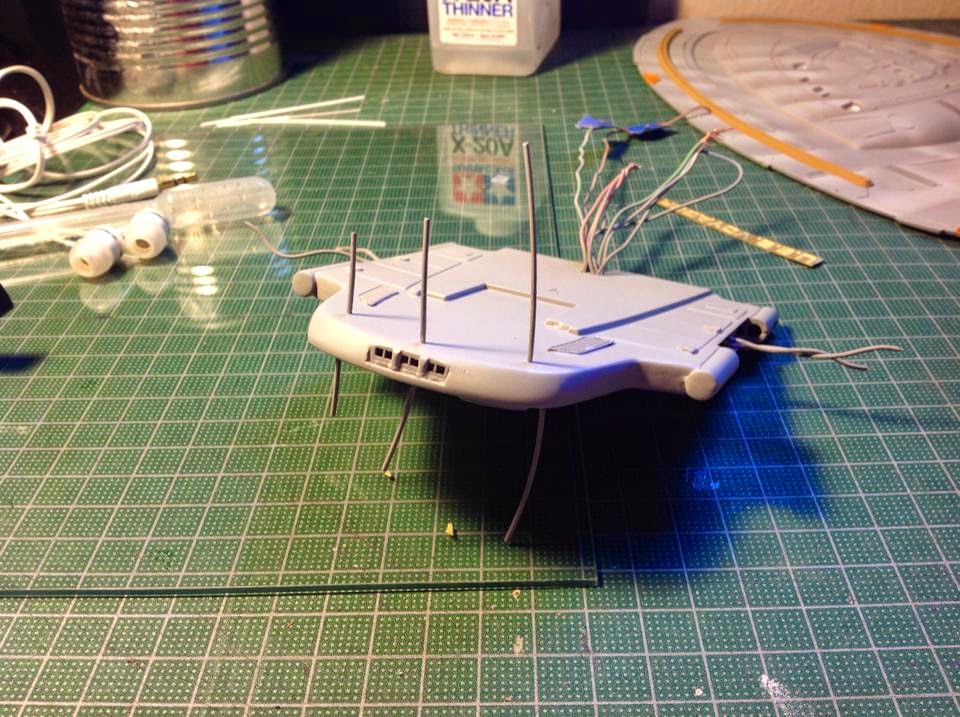


I next installed all the lighting inside the primary and secondary hulls. I used Fiber Optics for the Red/Green Nav lights and the strobes. For the blinking strobe lights, rather than buy a $40 control board, I just used a 1 Hz flashing LED and then wired regular white LEDs in series with it so that they all blink at the same time. There are two on the nose (top and bottom), one in front of the bridge, two on the fantail (top and bottom) and one on the belly. There is supposed to be one just above the hangar bay, but I am lazy and didn't feel like trying to squeeze one in there. :)
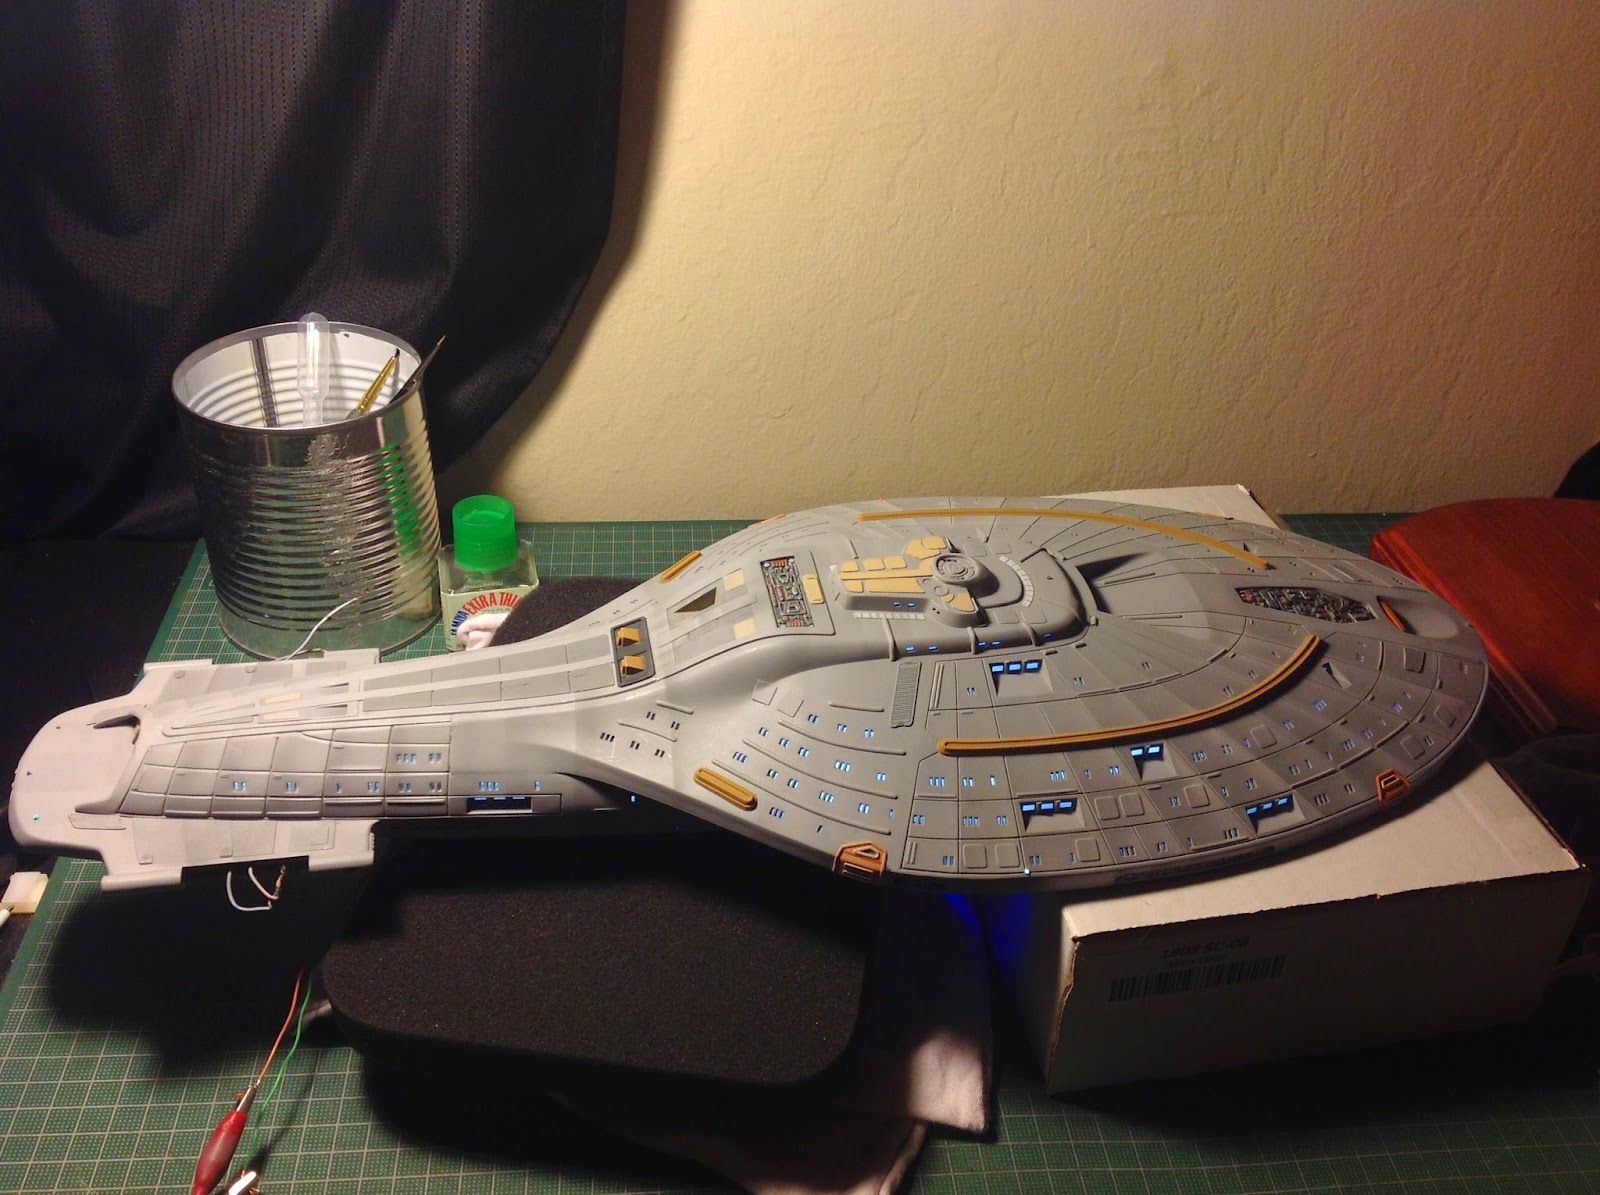
.jpg) I then glued the Saucer together, puttied the seams and touched them up.
I then glued the Saucer together, puttied the seams and touched them up.Connecting the saucer to the secondary hull was a special kind of difficult for some reason. I think that I needed to really sand down the areas where it joins some more before trying to glue them together. But I got it all together after all!
.jpg)
.jpg)
Next up was getting the "Spine" wired up and into place. I glued two 3 mm red LEDs to the the back side to illuminate the photon torpedo launchers. I initially thought that this piece didn't fit well because it wasn't sitting flush but then I looked at the studio model and saw that there is supposed to be a lip all around the edge. I still had light leaks peaking through the seam, however. But that is what Tulip Paint is for! Squeeze this into the crack and then wipe with a damp cloth, let it dry and paint over it. Bam! No more light leaks. I learned this from Steve Neill.
.jpg) I then puttied up the gaps where the Saucer piece fits into the secondary hull with Bondo Red Putty. I love the red putty, especially when you need to block light. I also use Squadron White Putty, but only when I need to have a hard edge. The red stuff is much better for filling seams, in my opinion. You can even squeeze it into the cracks and then wipe the surface down with alcohol, leaving the putty nicely in the crack.
I then puttied up the gaps where the Saucer piece fits into the secondary hull with Bondo Red Putty. I love the red putty, especially when you need to block light. I also use Squadron White Putty, but only when I need to have a hard edge. The red stuff is much better for filling seams, in my opinion. You can even squeeze it into the cracks and then wipe the surface down with alcohol, leaving the putty nicely in the crack..jpg)
After sanding I masked off the area and hit it with my base color, then added the shaded panel lines in that area.
.jpg)

Then I did the same for where the fantail hits the hull.


.jpg)
I am well aware that I need to get batter at filling gaps and sanding.....
Then I finished up the shading on the underside of the fantail.
 Finally, I glued the engines into place. The next step will be a clear coat of Pledge. This provides a glossy, level surface for which to adhere the waterside decals.
I use pledge because it is cheap and can be sprayed straight out of my airbrush. It cleans up with Windex, and it smells nice!
The only drawback is that you have to let it sit for two days before you can use decal solution on it. You have to let it sit for at least a week if you are going to do an enamel wash.
.jpg "Revell U.S.S. Voyager")


 This kit has a lot of tiny decals! But they really add to the detail and realism so I think that they are worth the effort. It took me two days to get them all on. next is to seal them in with another coat of Pledge(edit Feb 2020: now using Taniya TS-13 for this step). I'll let that cure for a few days and then hit it with some Testor's matte clear coat. (Edit Feb 2020: I now use Tamiya TS-80 Matte for this step). Then it get mounted to the base and it's done.
 I really don't like the red stripes on this. Hopefully the dull coat tones it down.
 I was really unhappy with the decals. there was a lot of silvering and you could see the edges of the decals. However, another coat of Pledge and all of that disappeared! Now I need to let this cure for a few days and then I can put the final matte coat on.
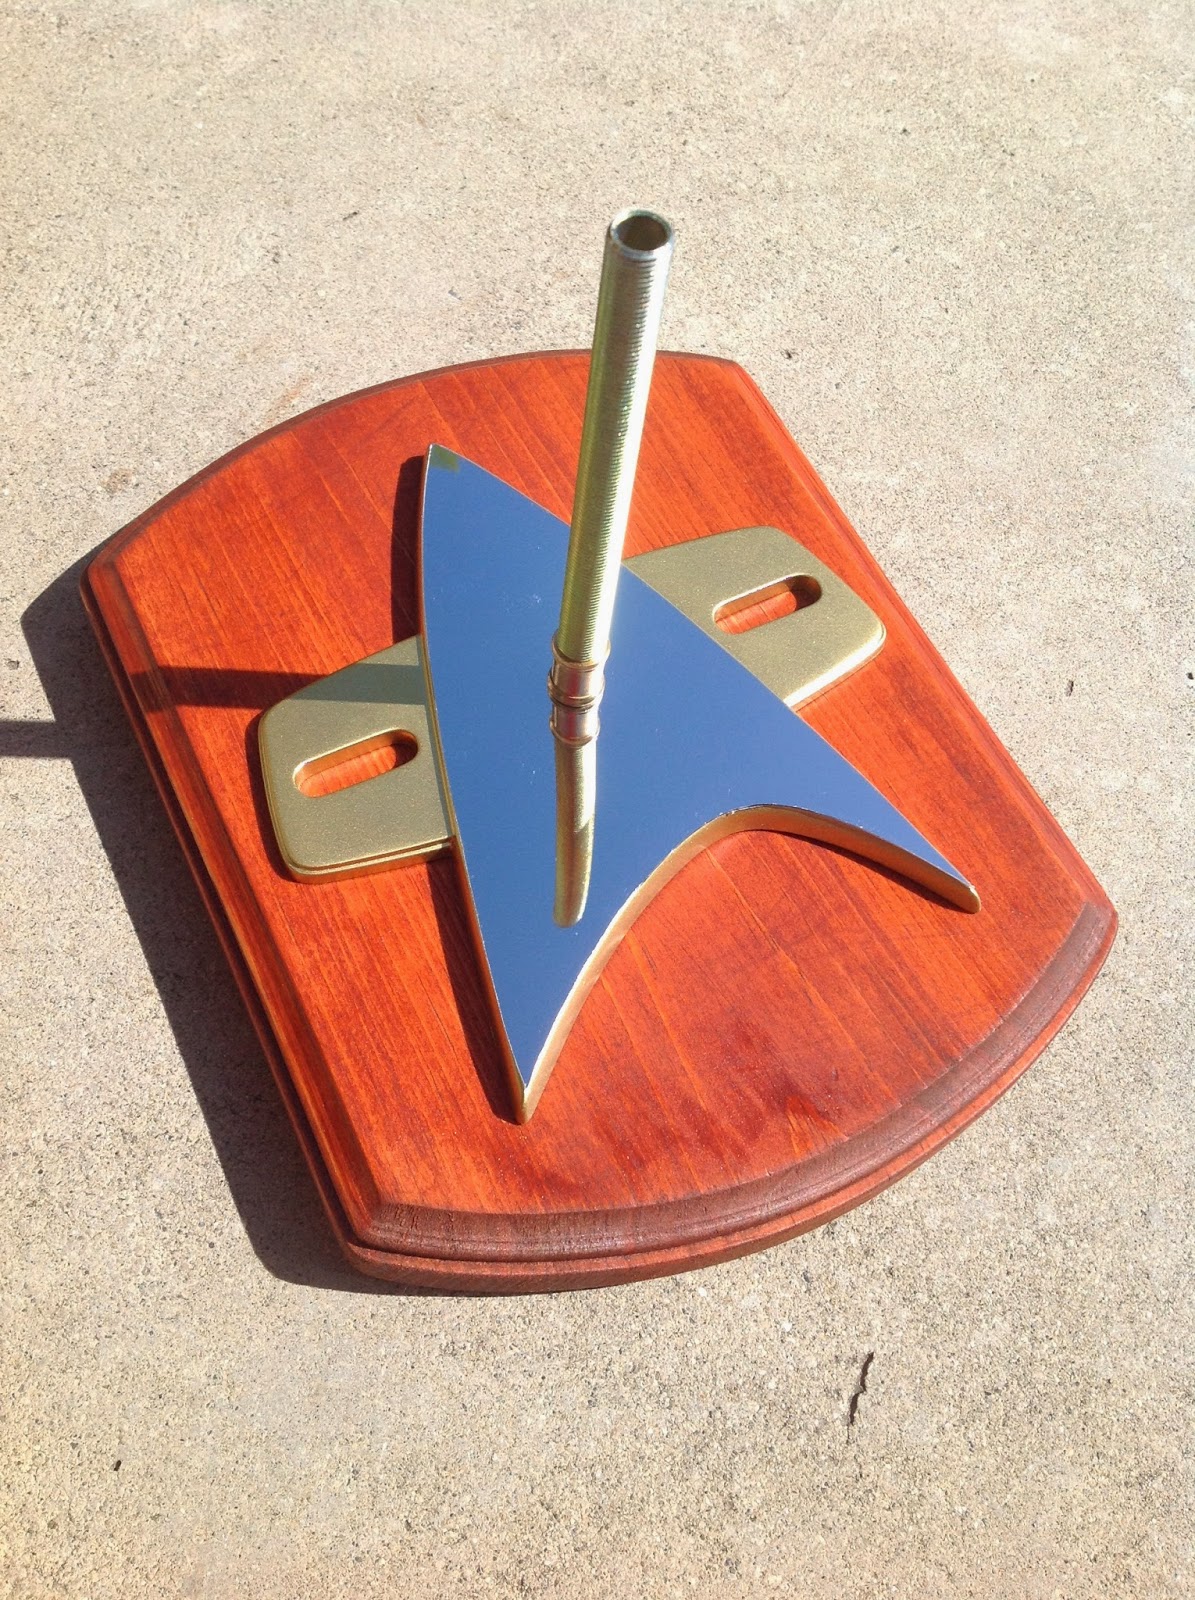
I cut the shape of the chevron out of self adhesive Mirror Card and stuck it on top. This stuff scratches very easily, so don't take the protective coating off until you are finished!

.jpg&container=blogger&gadget=a&rewriteMime=image%2F*)
.jpg)
Tuesday, July 29, 2014
Confessions of a Styrene Addict
This will be my lengthy introduction first post. After this I will try to document the builds as I do them.
When I was a kid, I loved to build plastic models! I built cars, tanks, airplanes, ships, spaceships......whatever I could get! I built models all the way up until I was around 30 years old. Then I got married and had a kid; I no longer had any money to build models.
I got the bug again 12 years later when I found the videos of Steve Neill on You Tube. This was a year ago. It was then that I realized that I was never very good at building scale models. This guy was doing really cool things with LED Lights and doing cool paint jobs with an airbrush! I wanted to do that, too! But could I? I didn't think so, but I was going to try.
Steve and I have since become friends. On top of being a fantastic model and prop builder he is also a really down to earth, nice guy.

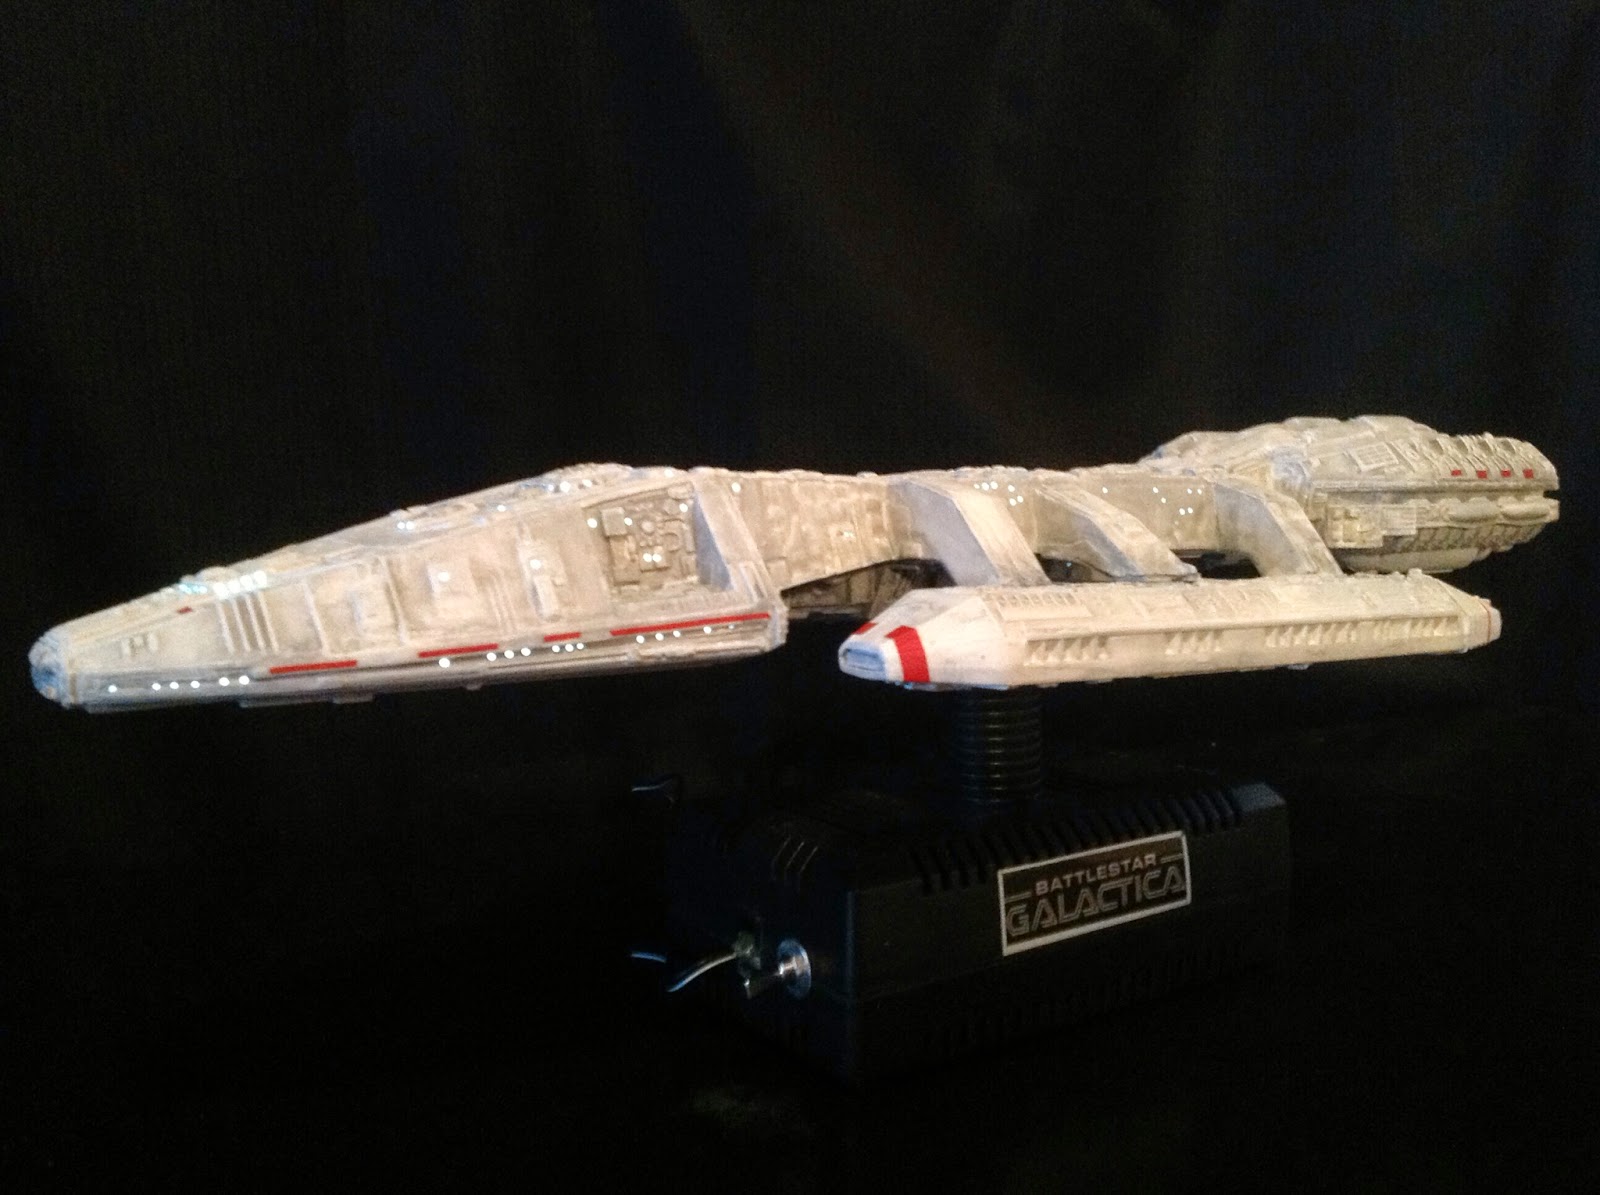
I had an old Monogram Battlestar Galactica stored on the garage that I had slapped together many years before. I got that out and pulled it apart and stripped all the paint off. My Father-In-Law was into electronics, so I had access to a soldering iron, solder, wires, switches, resistors and some power supplies. I then went to radio shack and bought some LEDs.
I wired it up, rebuilt it and repainted it (I didn't have an airbrush yet). I still didn't know what I was doing paint wise, but I got it together and it was lit, darn it! It wasn't pretty, but this was my first model with LED lighting! I was very happy.


I then tried my hand at some small Star Trek kits. My first attempt was the small Polar Lights U.S.S. Enterprise. I didn't put any lights in this one. My focus here was learning how about filling gaps with putty and sanding, priming and painting, clear coat and decals.
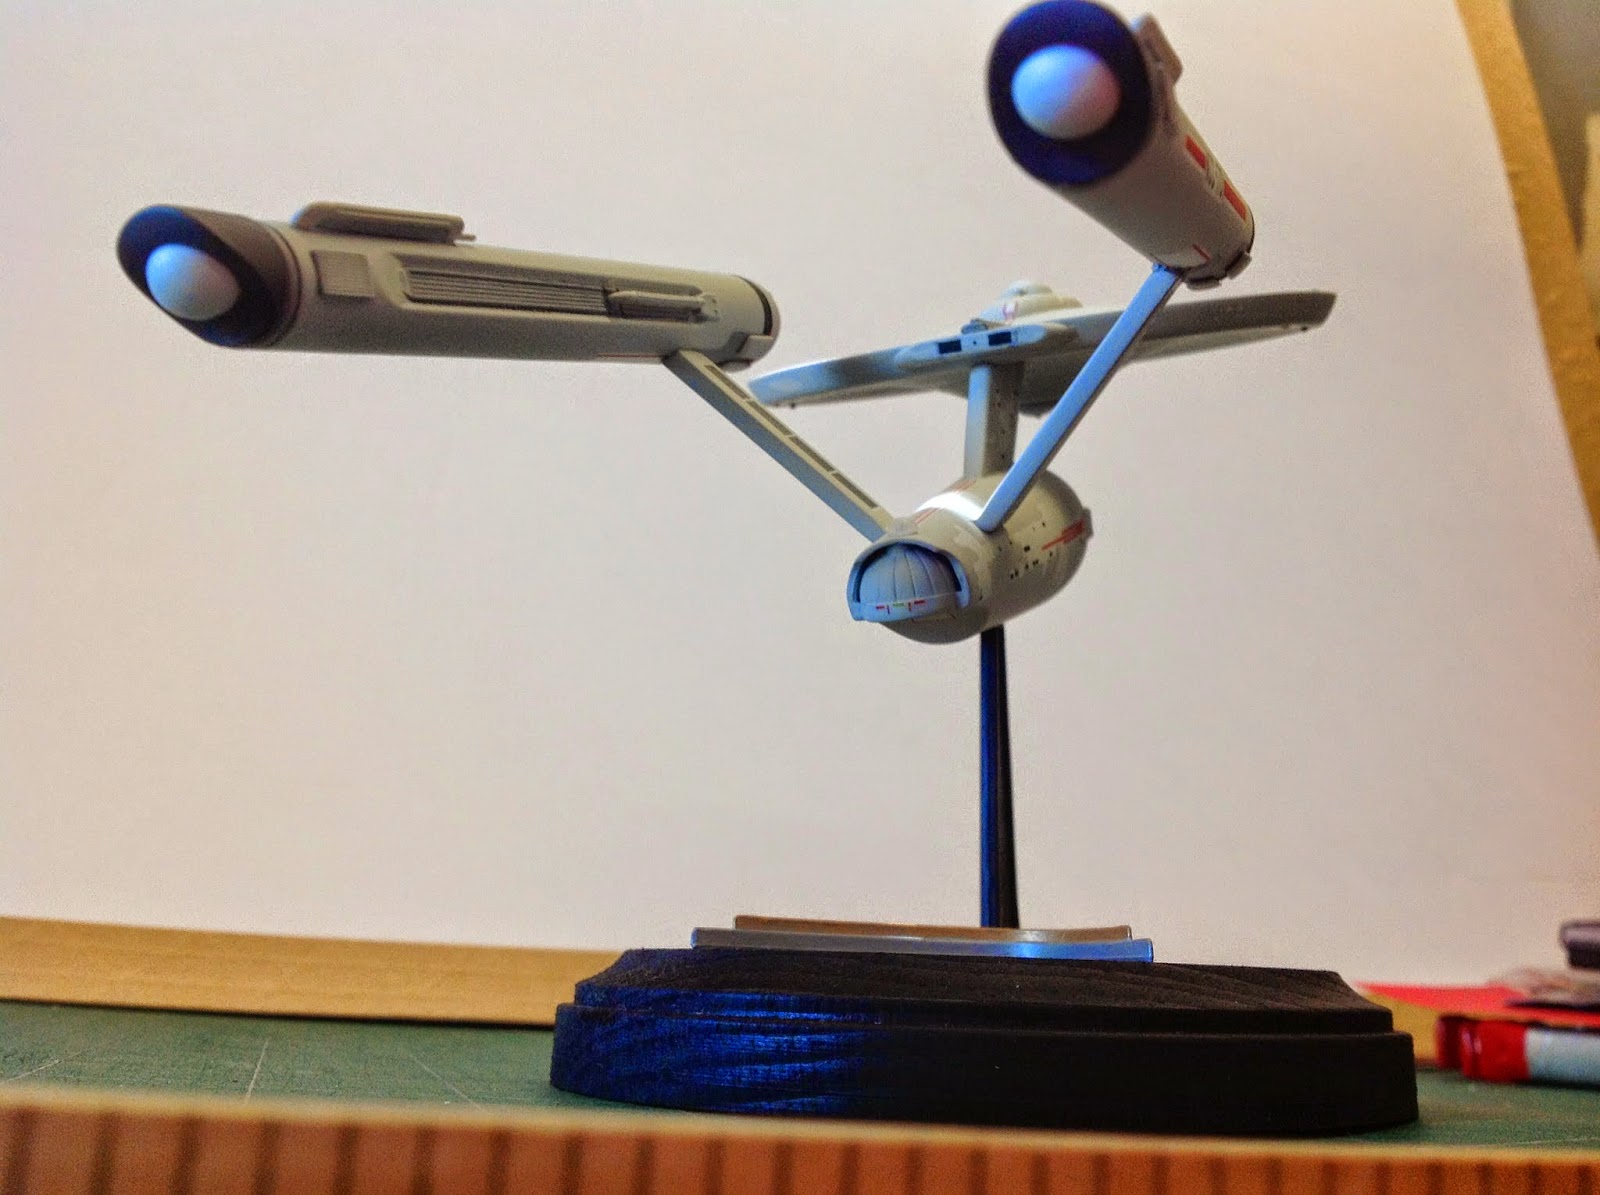


I screwed up on the decals, though. I didn't know about laying down a layer of clear gloss before applying the decals. It was Mr. Simon "Papa Smurf" Mercs of The Kit Factory who set me straight on that problem. Simon is a very high end, high quality model builder. His work is absolutely phenomenal, but he isn't above helping some poor schmuck like me do his decals right!
I then tackled some of the small 1:2500 Star Trek kits. I still didn't have an airbrush, but these were all about learning how to decal properly. I started with the Three Enterprise set and then did the Enterprise-C.


I finally got a cheap Chinese airbrush and compressor on Amazon and got to learning how to us it. My first attempt at airbrushing was on the 1:2500 Enterprise-D. I was happy with the results.


From here on I felt confident enough to tackle some bigger, more expensive kits. I won't go into any more detail for each one. I'll just show you the results and the progress I have made in my skill level. Each model I do gets better and better, but I still have a long way to go!


.jpg)


.jpg "Moebius Original Battlestar Galactica")
.jpg "Moebius Original Battlestar Galactica")
.jpg "Moebius Original Battlestar Galactica")
+copy.jpg "Moebius Original Battlestar Galactica")


When I was a kid, I loved to build plastic models! I built cars, tanks, airplanes, ships, spaceships......whatever I could get! I built models all the way up until I was around 30 years old. Then I got married and had a kid; I no longer had any money to build models.
 |
| Steve Neill's Garage |
Steve and I have since become friends. On top of being a fantastic model and prop builder he is also a really down to earth, nice guy.
Beginning Again
I had an old Monogram Battlestar Galactica stored on the garage that I had slapped together many years before. I got that out and pulled it apart and stripped all the paint off. My Father-In-Law was into electronics, so I had access to a soldering iron, solder, wires, switches, resistors and some power supplies. I then went to radio shack and bought some LEDs.
I wired it up, rebuilt it and repainted it (I didn't have an airbrush yet). I still didn't know what I was doing paint wise, but I got it together and it was lit, darn it! It wasn't pretty, but this was my first model with LED lighting! I was very happy.
I then tried my hand at some small Star Trek kits. My first attempt was the small Polar Lights U.S.S. Enterprise. I didn't put any lights in this one. My focus here was learning how about filling gaps with putty and sanding, priming and painting, clear coat and decals.
 |
| The Kit Factory |
I then tackled some of the small 1:2500 Star Trek kits. I still didn't have an airbrush, but these were all about learning how to decal properly. I started with the Three Enterprise set and then did the Enterprise-C.
I finally got a cheap Chinese airbrush and compressor on Amazon and got to learning how to us it. My first attempt at airbrushing was on the 1:2500 Enterprise-D. I was happy with the results.
From here on I felt confident enough to tackle some bigger, more expensive kits. I won't go into any more detail for each one. I'll just show you the results and the progress I have made in my skill level. Each model I do gets better and better, but I still have a long way to go!
Re-Imaged Moebius Battlestar Galactica
1969 Chevy Camaro
Psycho House
Pegasus Hobbies T2 Aerial HK
Starcrafts 1:1000 USS Akira
AMT/Ertl 1:1400 USS Enterprise-C
Moebius Original Battlestar Galactica
Next up I will try to document my build of Revell's U.S.S. Voyager!
Subscribe to:
Posts (Atom)