Monday, March 27, 2017

Revell "Rogue One" Imperial Star Destroyer Finale

Well, its no longer a "Rougue One" Star Destroyer; It's now an "Empire Strikes Back" Star Destroyer!

I got it all buttoned up using the clips that I stole from my wife, mwah-ha-ha! Did a test to make sure it was all still working. No problems, wow.
Sometimes shit works out.


Finally got to the painting phase. Flat coat of white, sprayed on a little unevenly for some tone variation. Masked off a few panels here and there and hit them with a light gray for a bit more variation.


For the gloss coat I didn't want to use the Futurefloor wax method this time around. When using that method it takes forever for it to cure and I didn't want to wait a week. So I used Tamiya TS-79 Semi-Gloss Clear. I let that dry overnight before applying the wash. I started the wash phase with much trepidation. I can never shake the feeling that I am screwing up a perfectly good paint job. But it worked out just fine. Once that was all dry, I applied a final coat of Testor's Dull Coat and it all came together nicely.


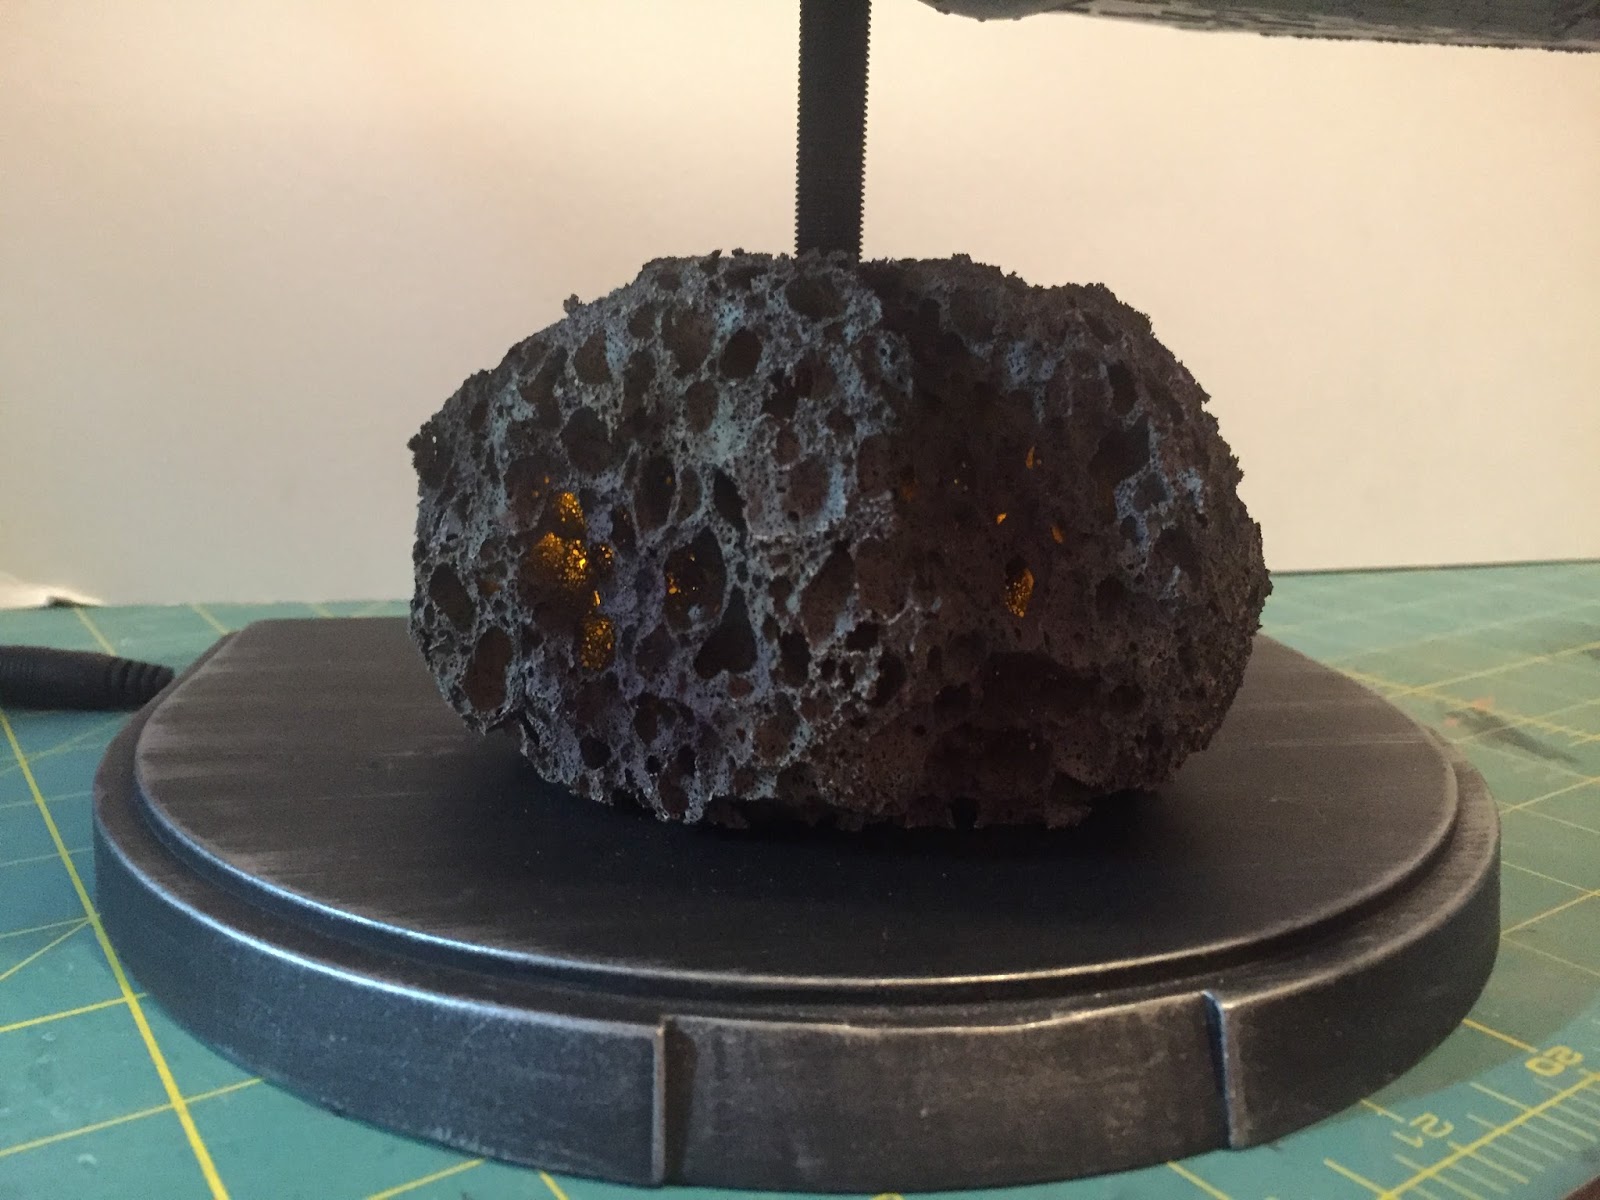
And here it is! All done and on the asteroid base with the mini Millennium Falcon attached to the back of the tower. As always, it's not really done until it's in the red hutch!  See you on the next project, true believers!


Monday, March 13, 2017

Revell "Rogue One" Imperial Star Destroyer Part 1


I've been working on this since finishing the
Excelsior. I just haven't been keeping a running Blog on the build, so here is the catch up!

First off, although it is a model kit, it is also a toy! For some darned reason they put landing gear on it! And a speaker hole for the built in sound effects.

So, those had to go! I glued them shut, puttied them up and sanded them down smooth.
Then I got some bit of styrene to add some details, taking artistic license, of course. If you look close, you can see where they were, but Its good enough for me.


Next up I spent a few days drilling out around 700 0.5mm holes! I broke many teeny drill bits (#76) in the process because I didn't have the correct pin vise. I found the right one after completing the right side of the triangle and the hangar bays, but not before breaking 10 of them! I was, to say the least....Irate.


Then I needed a way to mount the brass pole to hold the model up, so I epoxied a piece of wood and a shim (to level it) into the belly. Nice and strong!!


While waiting for more drill bits to get here, I started to think about the display base. I got an idea that this would be one of my favorite scenes from The Empire Strikes Back, where Han Solo evades the pursuing Star Destroyer by parking his ship on the back of the conning tower. So I asked my friend Jim Frost if he could 3D print me a teeny-weeny Millennium Falcon, not much bigger than 10mm across. And he did! Thanks Jim!


A little sanding, a very small brush and some paint and I have a Falcon that can literally stop on a dime.


Since this will be taking place just after they exited the asteroid belt, I decided that an asteroid would be a fine addition to the base, under the ship. I drove all over the damned place looking for an actual rock big enough to do the job. Home Depot, Armstrong Garden Center, Michael's, Hobby Lobby. Nobody had any damned lava rocks. Then I saw this sponge at Hobby Lobby. That could be a rock!

"No way", says the wife.
"It will always look like painted sponge", she says.
But my mind's eye can see it as an asteroid.

Lots of Primer, let it dry. Airbrish some browns, tans, greens....mix up a burgundy red here and there and VOILA,
an asteroid! In the movie you could see flashes of light coming from within the asteroids as the ships flew by, so I will be inserting yellow candle-flicker LEDs into the sponge for that effect.


The rest of the time was wiring up LEDS and running fiber optics to all those little holes. So many fibers! I used a partial 50ft. spool that I had and a whole new 50ft spool just for the right side of the ship and the hangar bays! So I ordered another 100ft spool and almost every inch of that went into the tower superstructure! I ran out before I even got that completey done. So I have another 200ft. on the way. I hope it is enough to finish this damned thing. I'd like to get all the fibers in and get it buttoned up so that I can start painting. Stay Tuned!


Monday, February 13, 2017

Star Trek U.S.S. Excelsior Finale

Alright, she is finished! Flaws and all there she is, the Great Experiment. For all the problems and mistakes she came out okay. I am always trying to improve, so maybe next time will be better!


Sunday, February 12, 2017

Star Trek U.S.S. Excelsior Part 6: How NOT to do decals

Well, I got to the decal phase finally. However, I don't think that I let the gloss coat sit long enough and my results suck ass. Im pretty sure that it wasn't fully cured even though I let it sit for as few days. It's been rainy here and I should have known to let it sit longer because of that.

When I applied the decal solution (Micro Set), I think it started to eat into the gloss coat and make pits where air got trapped. The results: Silvering under the decals which look like shit now.


When you take a step back and don't look so closely, it's not so bad but its there and it bugs me. Like Willy Nelson says "There's nothing I can do about it now."


This decal on the Hull didn't fit well at all. Lots of crinkling and folding going on. Even Micro Sol couldn't get it to sit smoothly. It looks a bit better with the dull coat on it as there is less reflectivity to catch the light on the edges. But next time I will paint these lines on.


Tuesday, January 24, 2017

Star Trek U.S.S. Excelsior Part 5: The Devil in the details

My Fears of screwing up the saucer paint job were, of course, unwarranted. But I like to aim low so that when I hit the mark it's all the better.
It took me a day or two to get all the masks onto the bottom of the saucer. Tedious work, that. I actually had to do it twice because I put them on wrong the first go around. It really helps to look at Lou's instructions while doing it. 


 The top didn't take nearly as long. I think I got it done in a few hours. This time I had the instructions handy. ;)


I mixed up a slightly lighter version of the base gray color and went over the whole thing. I peeled up a few masks and saw that there wasn't enough contrast so I went over the whole thing again.


After peeling off the masks I went over it with the lighter gray again to blend it all together and tone it down. This is a tricky step that can easily be overdone. I wasn't really sure if I liked it until I exposed the blue areas and then it all came together.


The bottom gave the same great results. There are a few little nit-picky issues here and there, but overall I think it came out pretty well.


 As you can see, lighting greatly affects the color! In the paint booth it looks almost white while under dimmer lighting it appears gray.


With all the painting done I was able to snip down all the fiber optics. They all still work, thank Dog.


My next step is to clean up all the windows. To get the ambient lighting from inside the model up the the "surface" where the windows are, I am inserting small snippets of fiber optic into each window hole. This is working out great.

I've also re-masked and gone over the secondary hull and warp engines to tone the color down to better match what I have done on the saucer. I will show you all of that in the next part. Stay Tuned!